How to customize previews for Google Wallet passes

Updated May 13, 2024 04:43
Overview
In this article, we'll go over the different preview customizations (aka top-level items) that are possible for each of the supported pass template types for Google Wallet passes. We'll cover what information is put into the preview for:
- Loyalty passes
- Ticket passes
- Generic passes
- Offer passes
- Transit passes
This tutorial serves as a valuable resource for developers looking to optimize their digital pass offerings in Google Wallet. Let's dive in!
Loyalty passes
This is how previews or top-level items look for loyalty passes in Google Wallet:
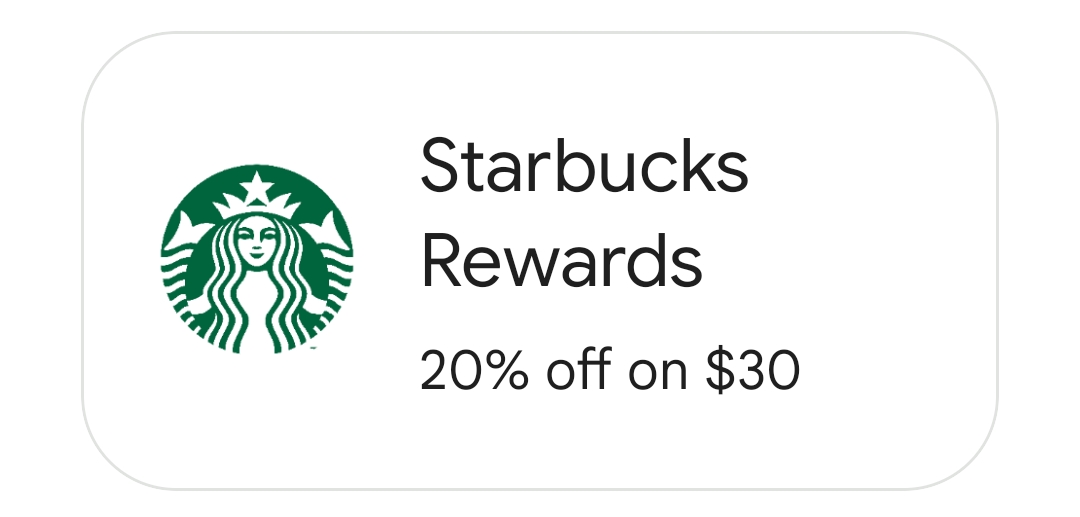
They take information from 3 places:
- LoyaltyClass's
localizedIssuerName("Starbucks Rewards" in the screenshot) - LoyaltyClass's
localizedProgramName("20% off on $30" in the screenshot) - LoyaltyClass's
programLogo(the mermaid in the screenshot)
If no
programLogois provided, the device will take the first letter of thelocalizedIssuerNameand use that in place of the logo.
Ticket passes
This is how previews or top-level items look for ticket passes in Google Wallet:
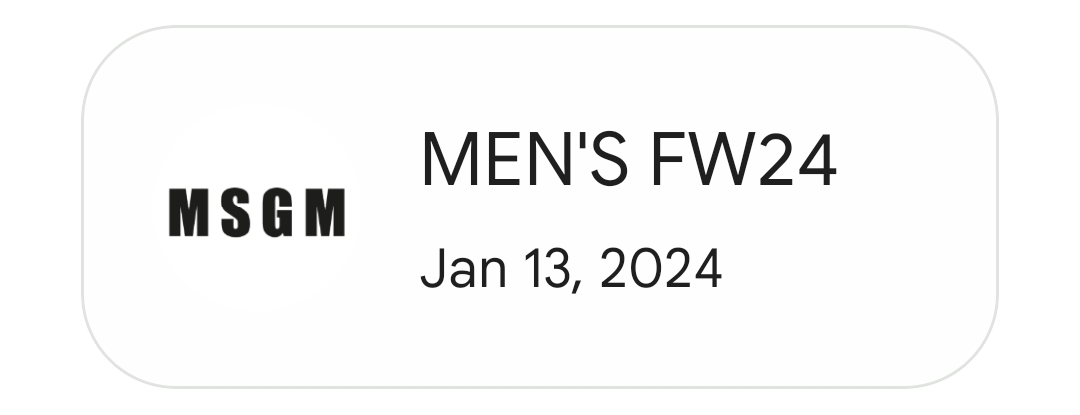
They take information from 3 places:
- EventTicketClass's
eventName("MEN'S FW24" in the screenshot) - EventTicketClass's
dateTime.startordateTime.doorsOpen("Jan 13, 2024" in the screenshot) - EventTicketClass's
logo(MSGM in the screenshot)
If no
logois provided, the device will take the first letter of theeventNameand use that in place of the logo.
Generic passes
This is how previews or top-level items look for generic passes in Google Wallet:
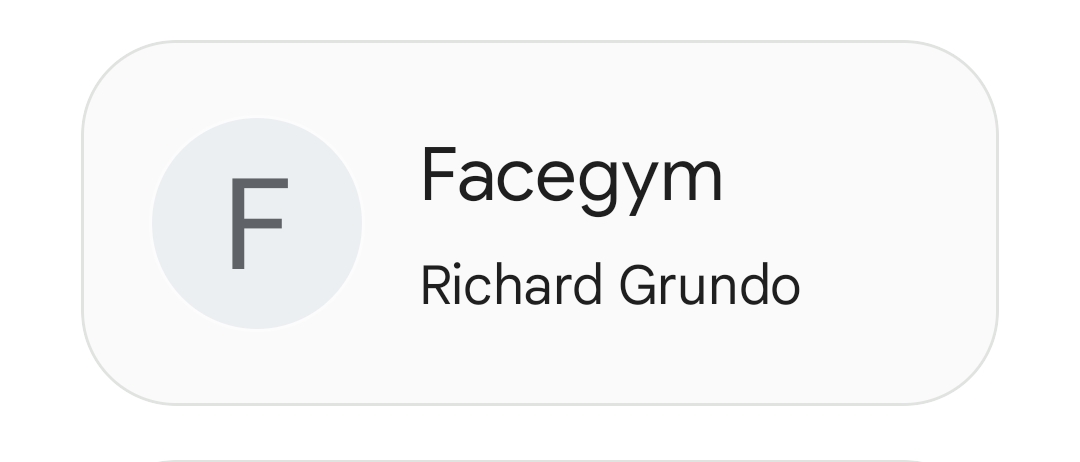
They take information from 3 places:
- GenericObject's
cardTitle("Facegym" in the screenshot) - GenericObject's
header("Richard Grundo" in the screenshot) - GenericObject's
logo(F in the screenshot)
If no
logois provided, the device will take the first letter of thecardTitleand use that in place of the logo.
Offer passes
This is how previews or top-level items look for offer (aka coupon) passes in Google Wallet:
They take information from 3 places:
- OfferClass's
localizedProvider("Starbucks Rewards" in the screenshot) - OfferClass's
localizedTitle("20% off on $30" in the screenshot) - OfferClass's
titleImage(The mermaid in the screenshot)
If no
titleImageis provided, the device will take the first letter of thelocalizedProviderand use that in place of the logo.
Transit passes
This is how previews or top-level items look for transit passes in Google Wallet:
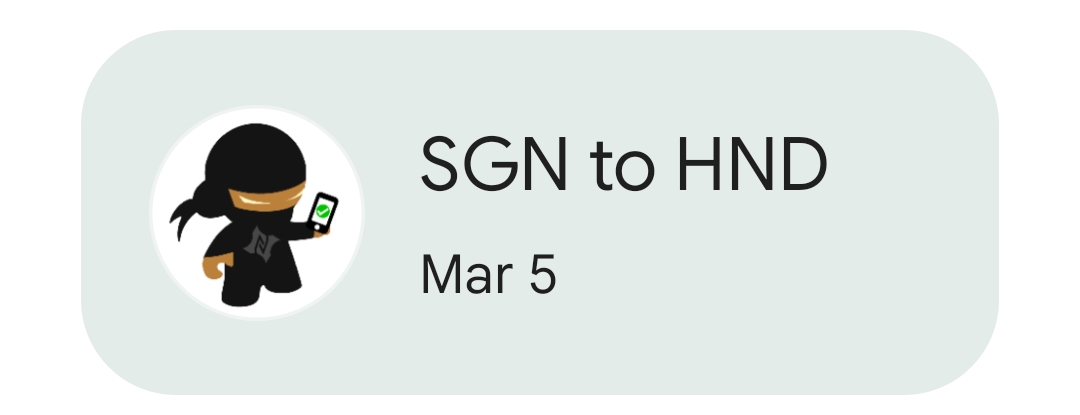
They take information from 3 places:
- FlightClass's
origin.airportIataCodeanddestination.airportIataCode("SGN to HND" in the screenshot) - FlightClass's
localScheduledDepartureDateTime("Mar 5" in the screenshot) - FlightClass's
flightHeader.carrier.airlineLogo(Ninja in the screenshot)
Issuing Google passes easily with PassNinja
With PassNinja, you create a custom API to meet your needs, use our ready-made SDKs in your favorite language, and just send an create call to issue a new Google pass that customizes your preview.
If you're ready to move at ninja speed and ship product, go sign up. It's free to get started, just click the "Get Started for Free" button in the top right of this website and fill out the form - we'll give you $10 in free credits!
Conclusion
This guide thoroughly explains the customization options available for Google Wallet passes, demonstrating how strategic use of information and visuals can significantly improve the user interface of digital passes. By focusing on the unique aspects of each pass type, developers can design passes that not only meet the functional needs of users but also enhance the overall user experience.
If you have any feedback on this guide, please do not hesitate to reach out!