How to generate IDs for Google NFC passes

Updated May 13, 2024 04:25
Overview
This guide aims to help developers quickly generate Issuer and Collector parameters in the Google Developer portal for working with NFC enabled Google Wallet passes. Issuer and Collector IDs are necessary for NFC enabled passes that work with Google's Smart Tap protocol.
We'll start by generating an Issuer ID which allows Google to validate the merchant that will be publishing Google Wallet passes. Once we have an approved Issuer ID, then we'll generate an associated Collector ID for scanning those passes with a VAS reader. For that we'll need to create private / public key pair.
Once generated, we'll help you locate your Collector ID so you can load it into a reader. We'll also cover how to associate the Issuer ID that is associated to your Collector ID to your passes.
Requesting an Issuer ID
To integrate your business with Google Wallet, you'll need to request an Issuer ID. This identifies you as a verified merchant on Google's ecosystem. To get one for your business follow these steps:
- Fill out this form and wait for it to be approved. This is generally pretty quick, like a mater of hours.
- Once approved, navigate to the “Google Wallet API” tab, request access to the Wallet API.
- In the pop-up form, describe your use case. You want to lean towards transactional use cases versus access control ones. Think loyalty points and coupons over of boarding passes and house keys. This will expedite the approval process.
- After you submit your request, it takes 1–2 business days for the support team to review and approve your application.
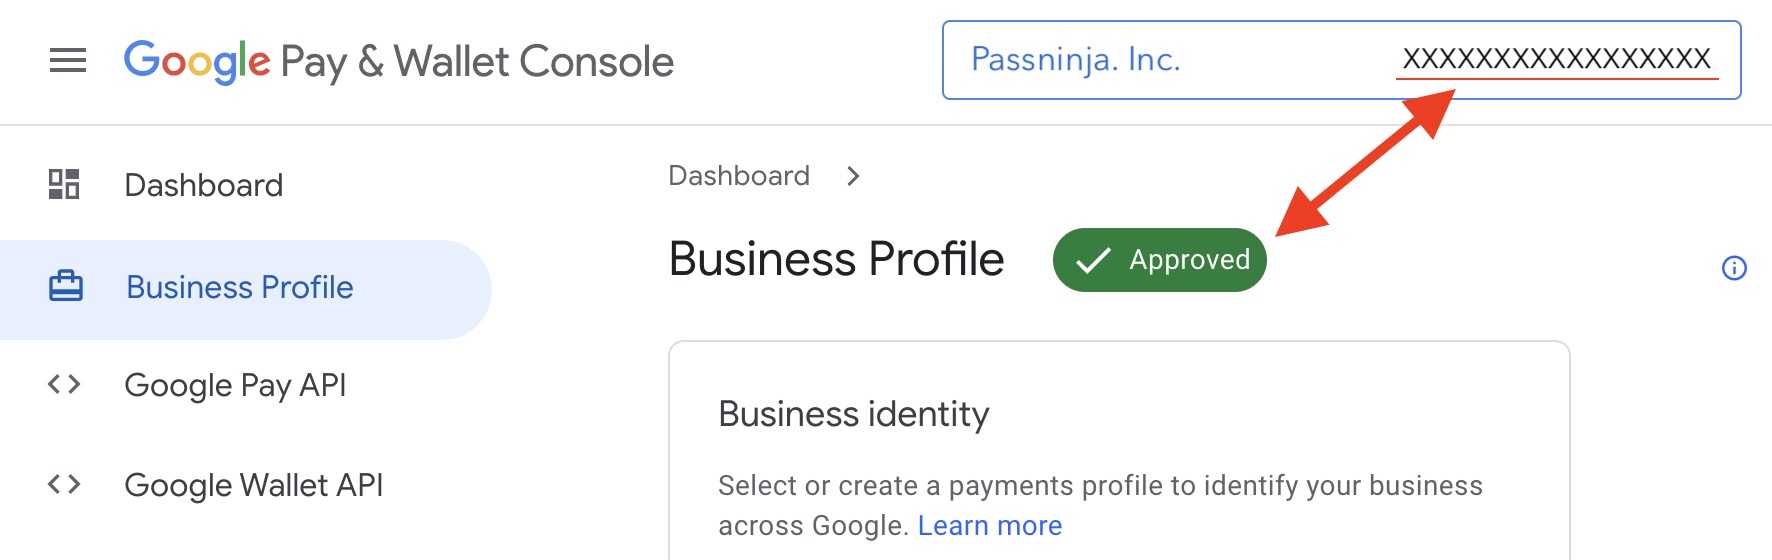
- After you receive the approval notice, in the “Business Profile” tab in the Google Pay & Wallet Console, you can find your issuer details.
Generating a Collector ID
Collector IDs must be loaded onto any reader you wish to be compatible with passes that have the associated Redemption Issuer ID. In order to get a Collector ID you have to:
- Generate a private key
- Generate a public key
- Upload the public key in pem format into the Google Developer portal
- Grab your Collector ID
Let's go through the steps to generate your Collector ID
Generate a private key
To generate a private key you'll need to use a tool like OpenSSL. Once installed, the tool can be invoked from the command line. Below is the basic command for creating a private key:
openssl ecparam -name prime256v1 -genkey -noout -out private.pemThis will generate one file called private.pem. Be sure to save this file in a place you remember because you will need it to configure your NFC / VAS enabled reader.
Generate a public key
openssl ec -in private.pem -pubout -out pubkey.pemThis will generate one file called pubkey.pem . Be sure to save this file in a place you remember because you will need to upload it shortly.
Upload the public key to the Google Developer portal
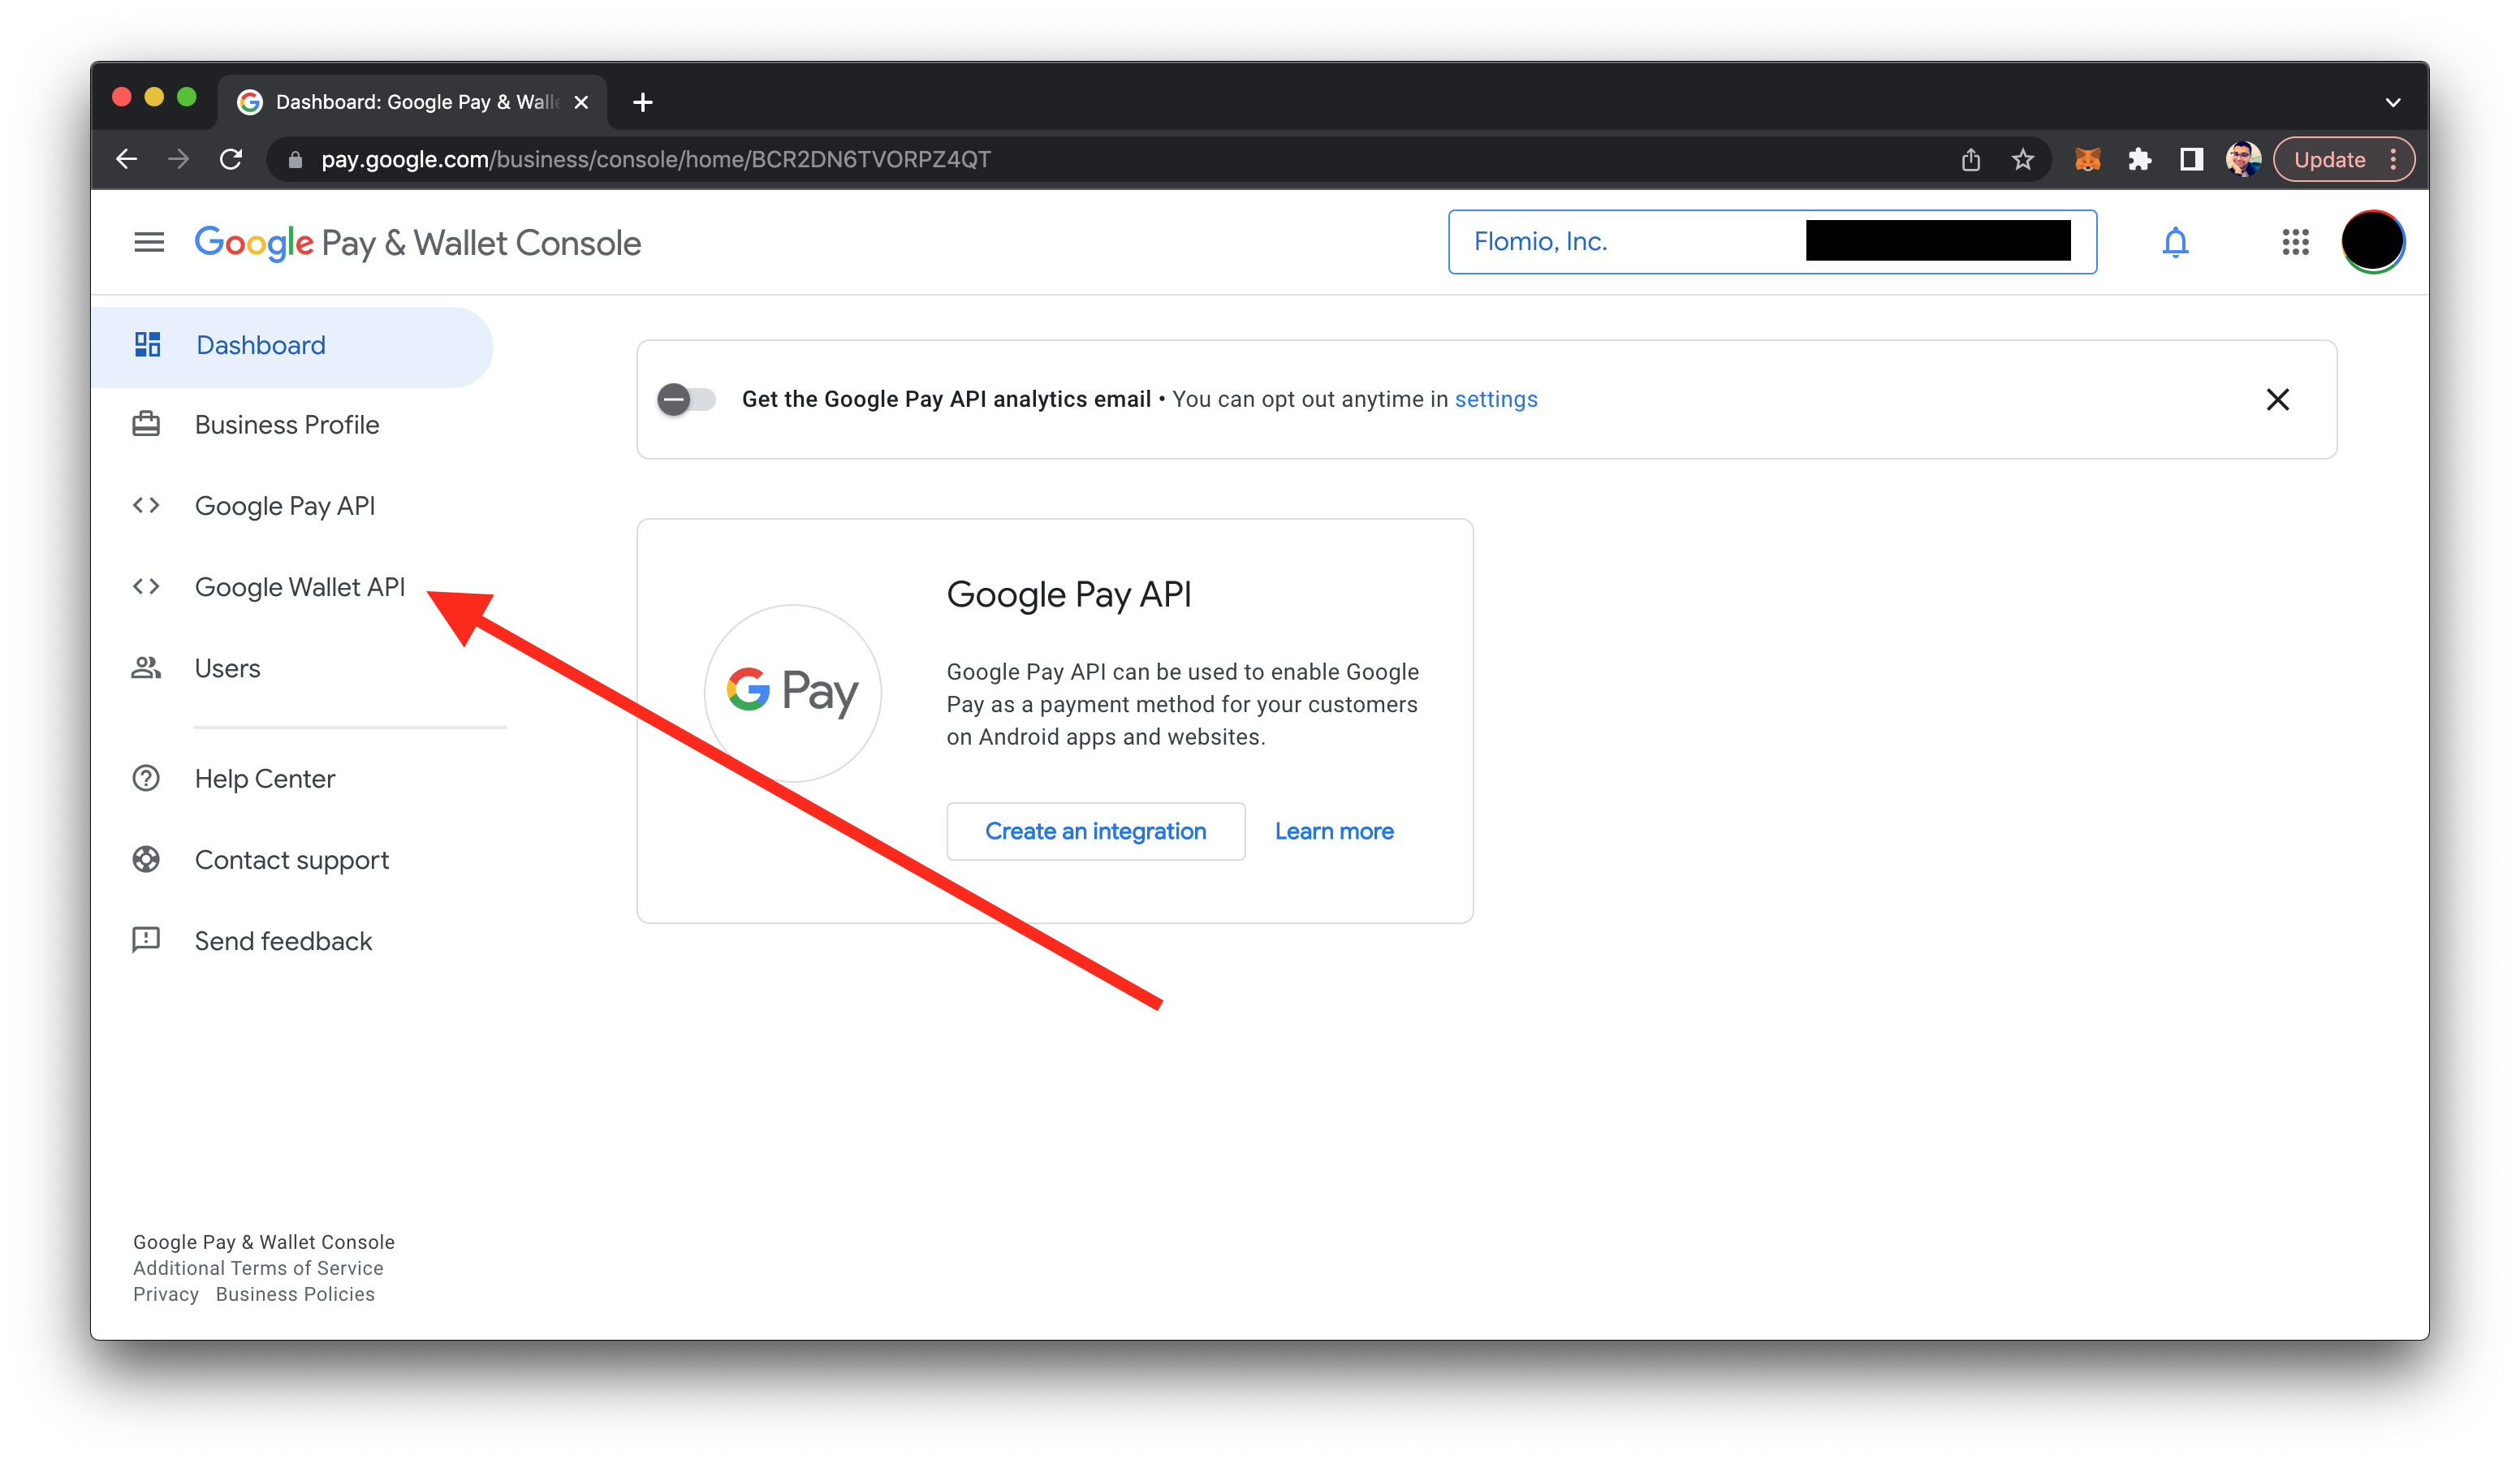
For this, you'll need to login, then go to the Google Wallet API section.
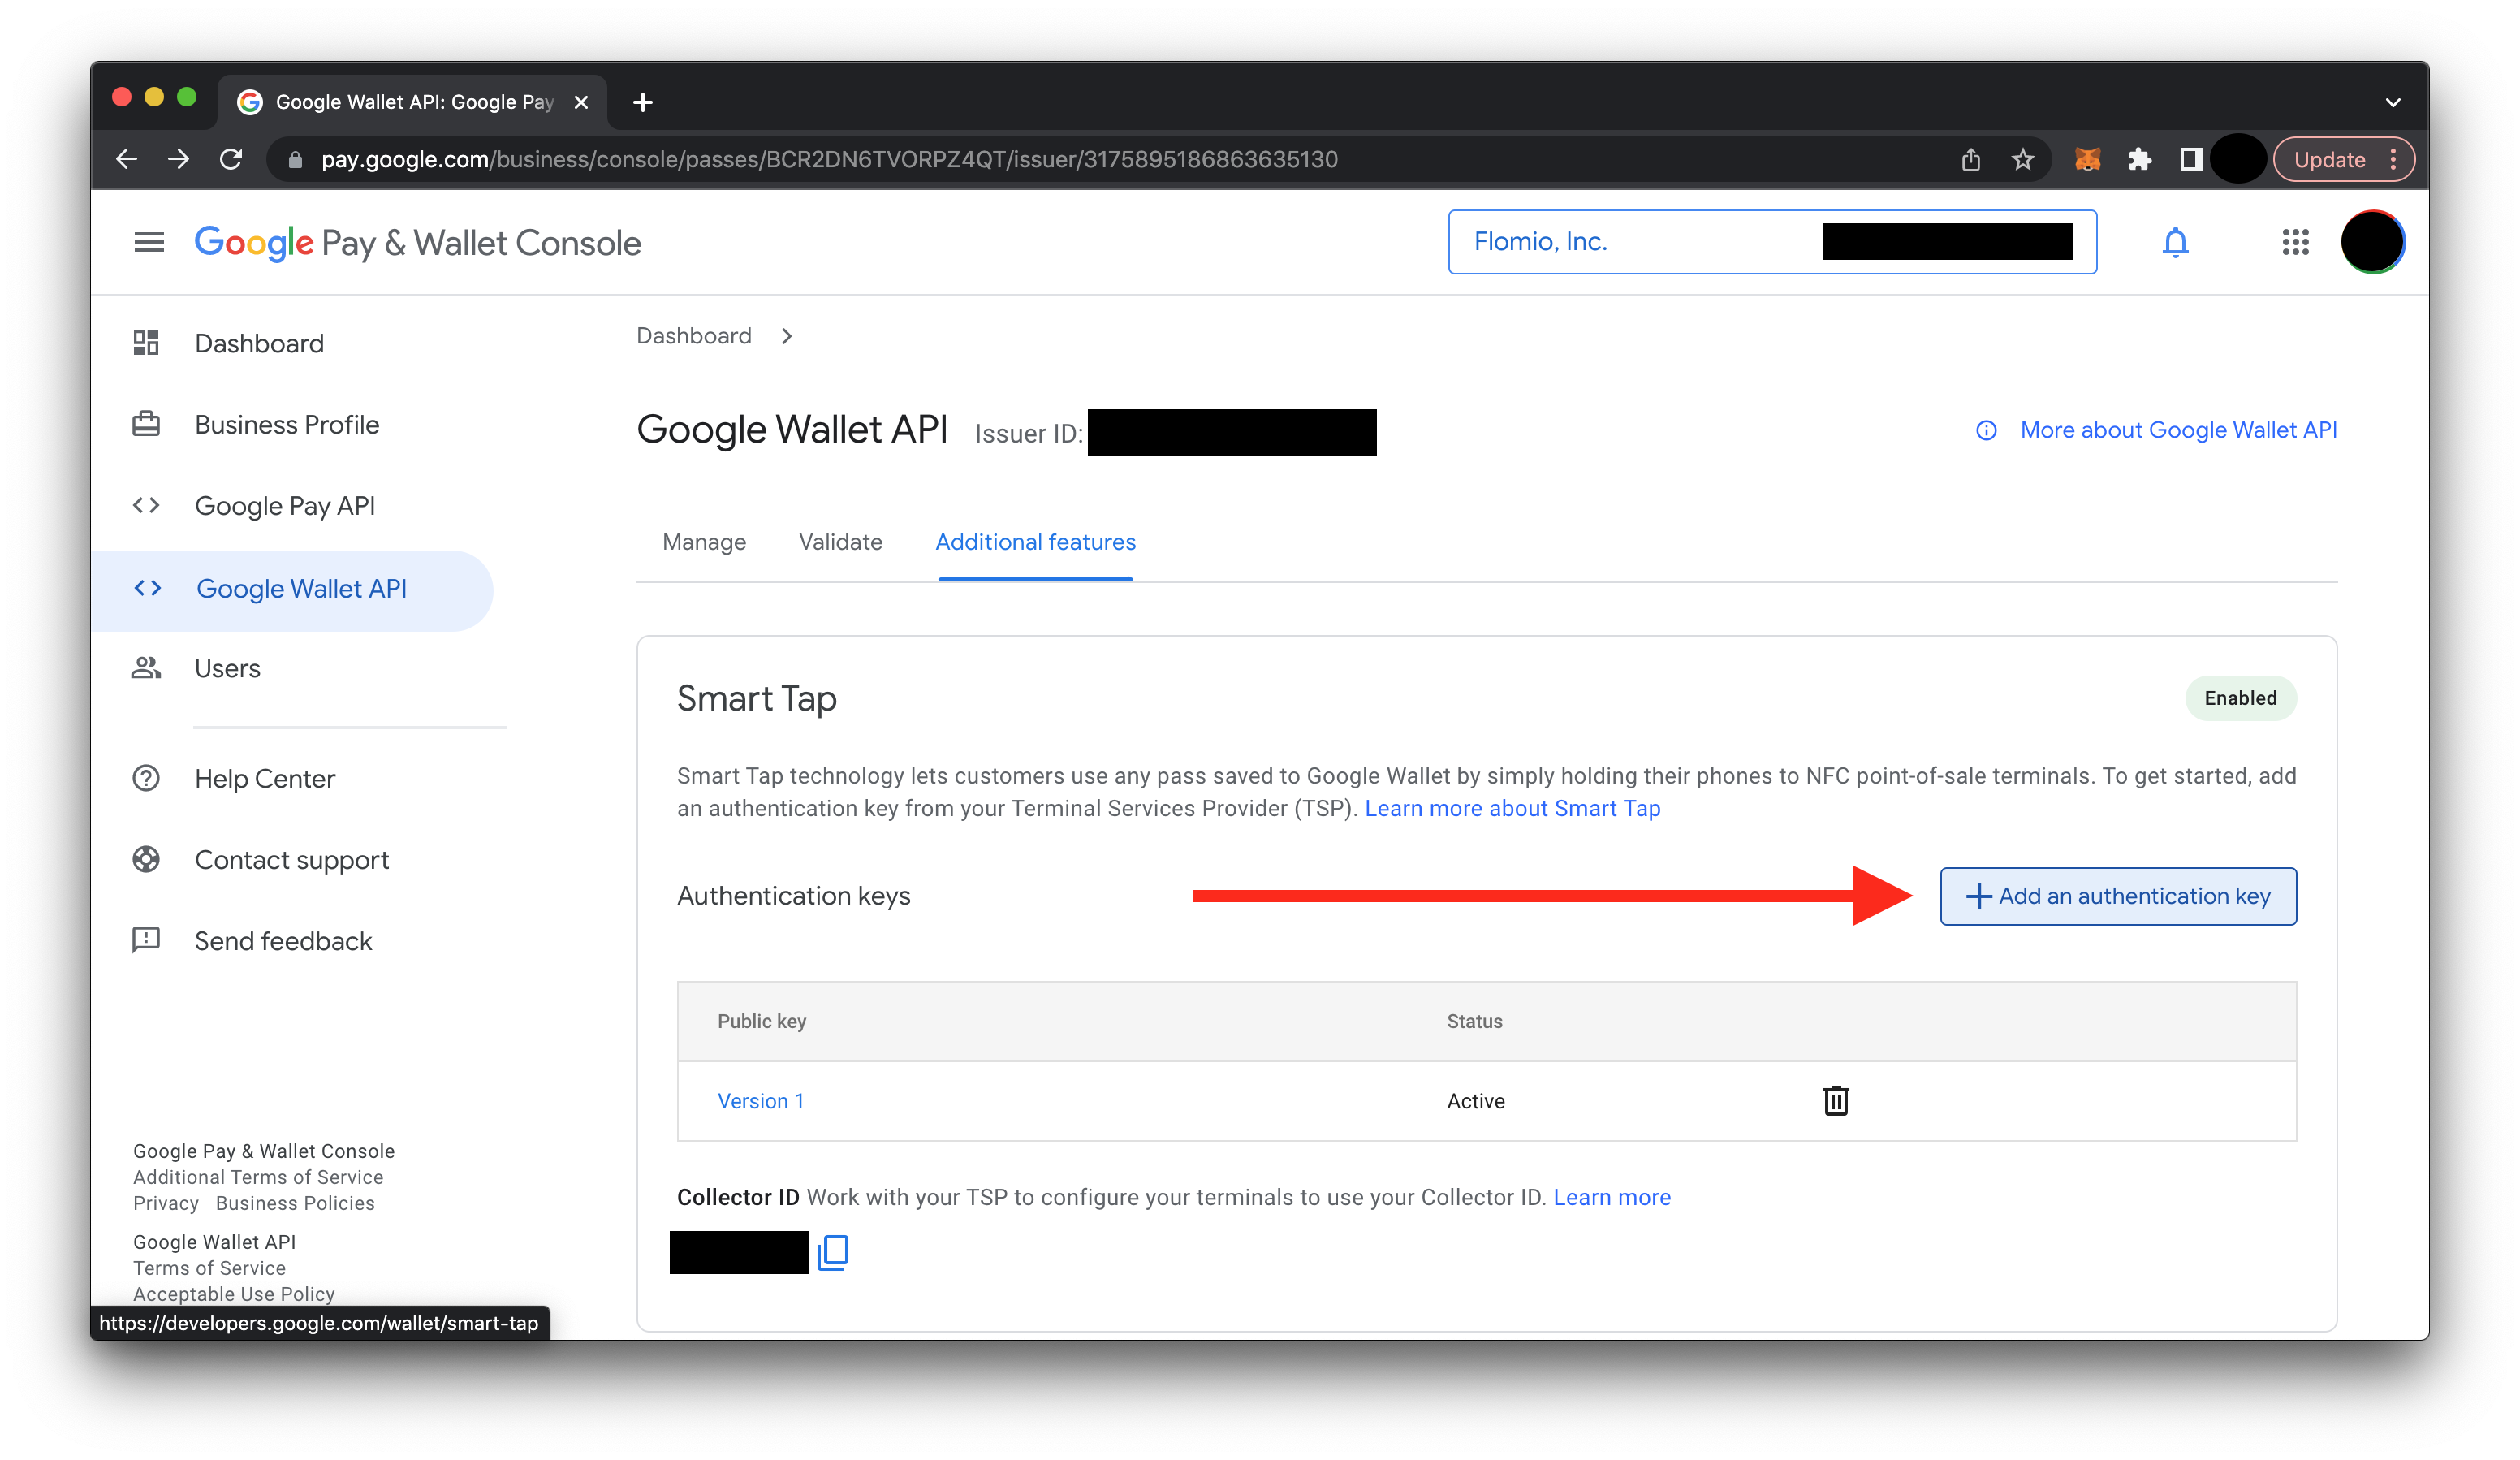
Then click "Additional features" (highlighted in blue) and click the "Add an authentication key" button.
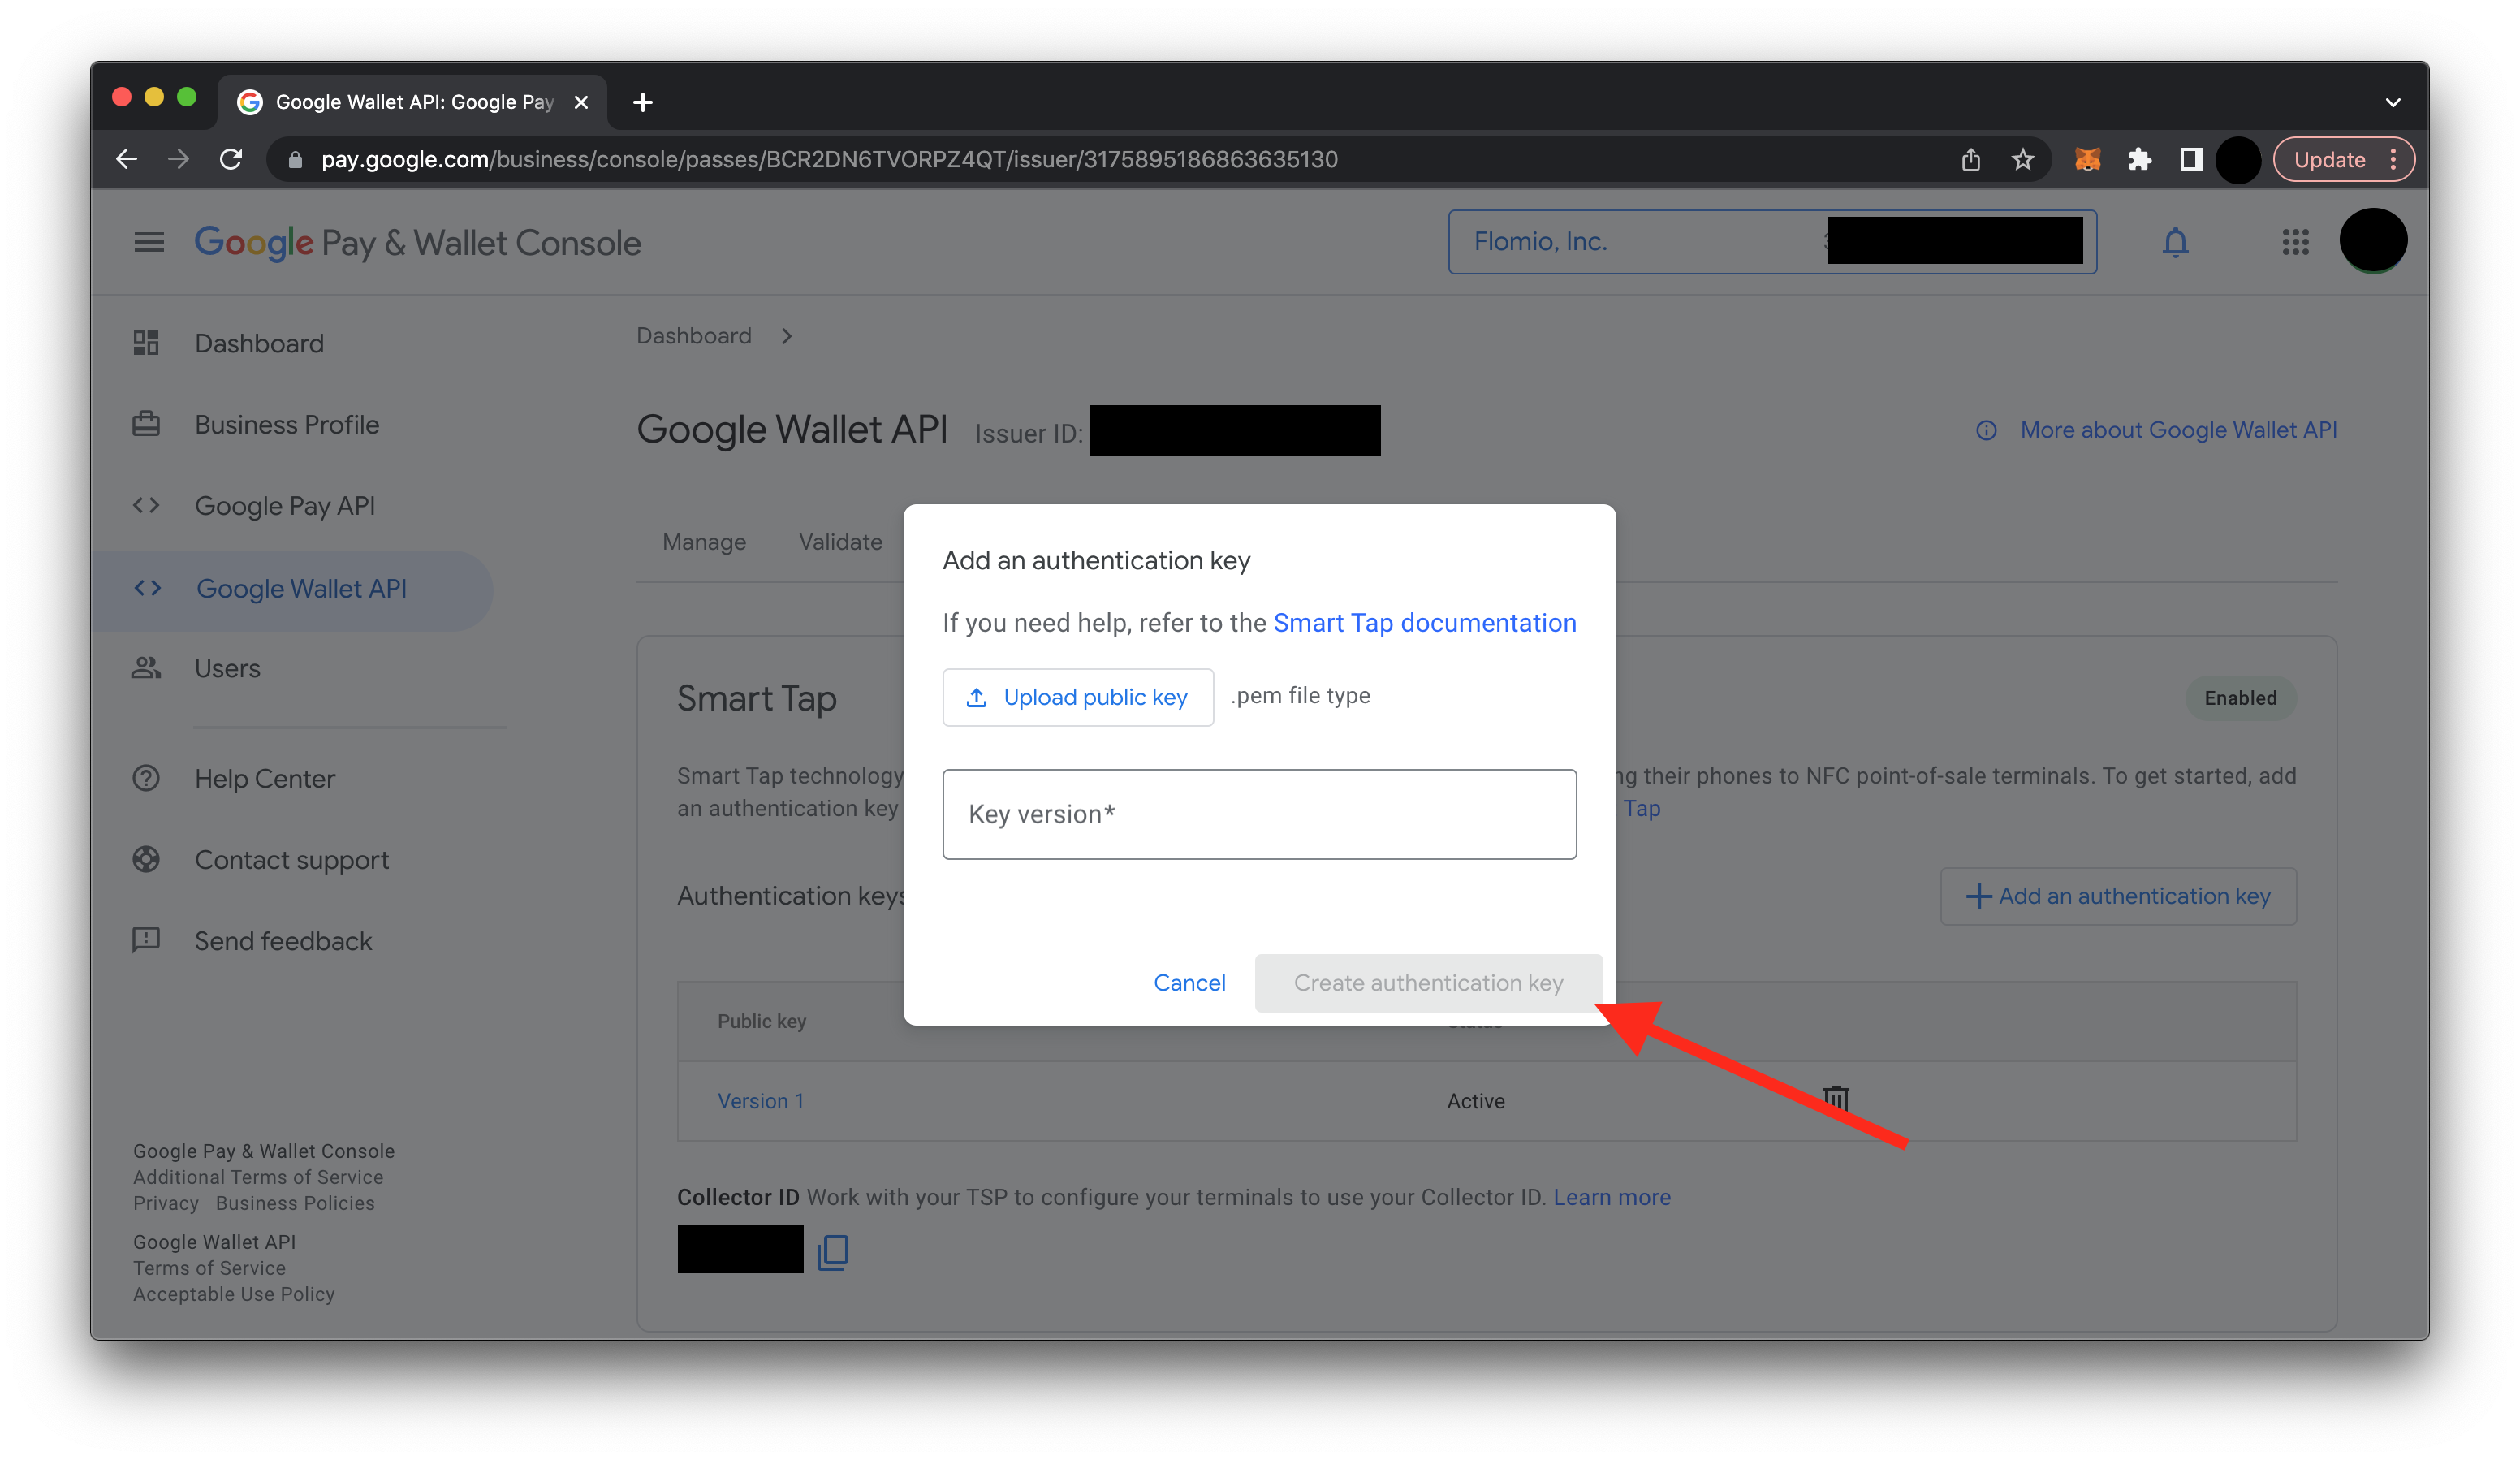
Now put a "1" in the field labeled "Key version" and upload the pubkey.pem file we generated above
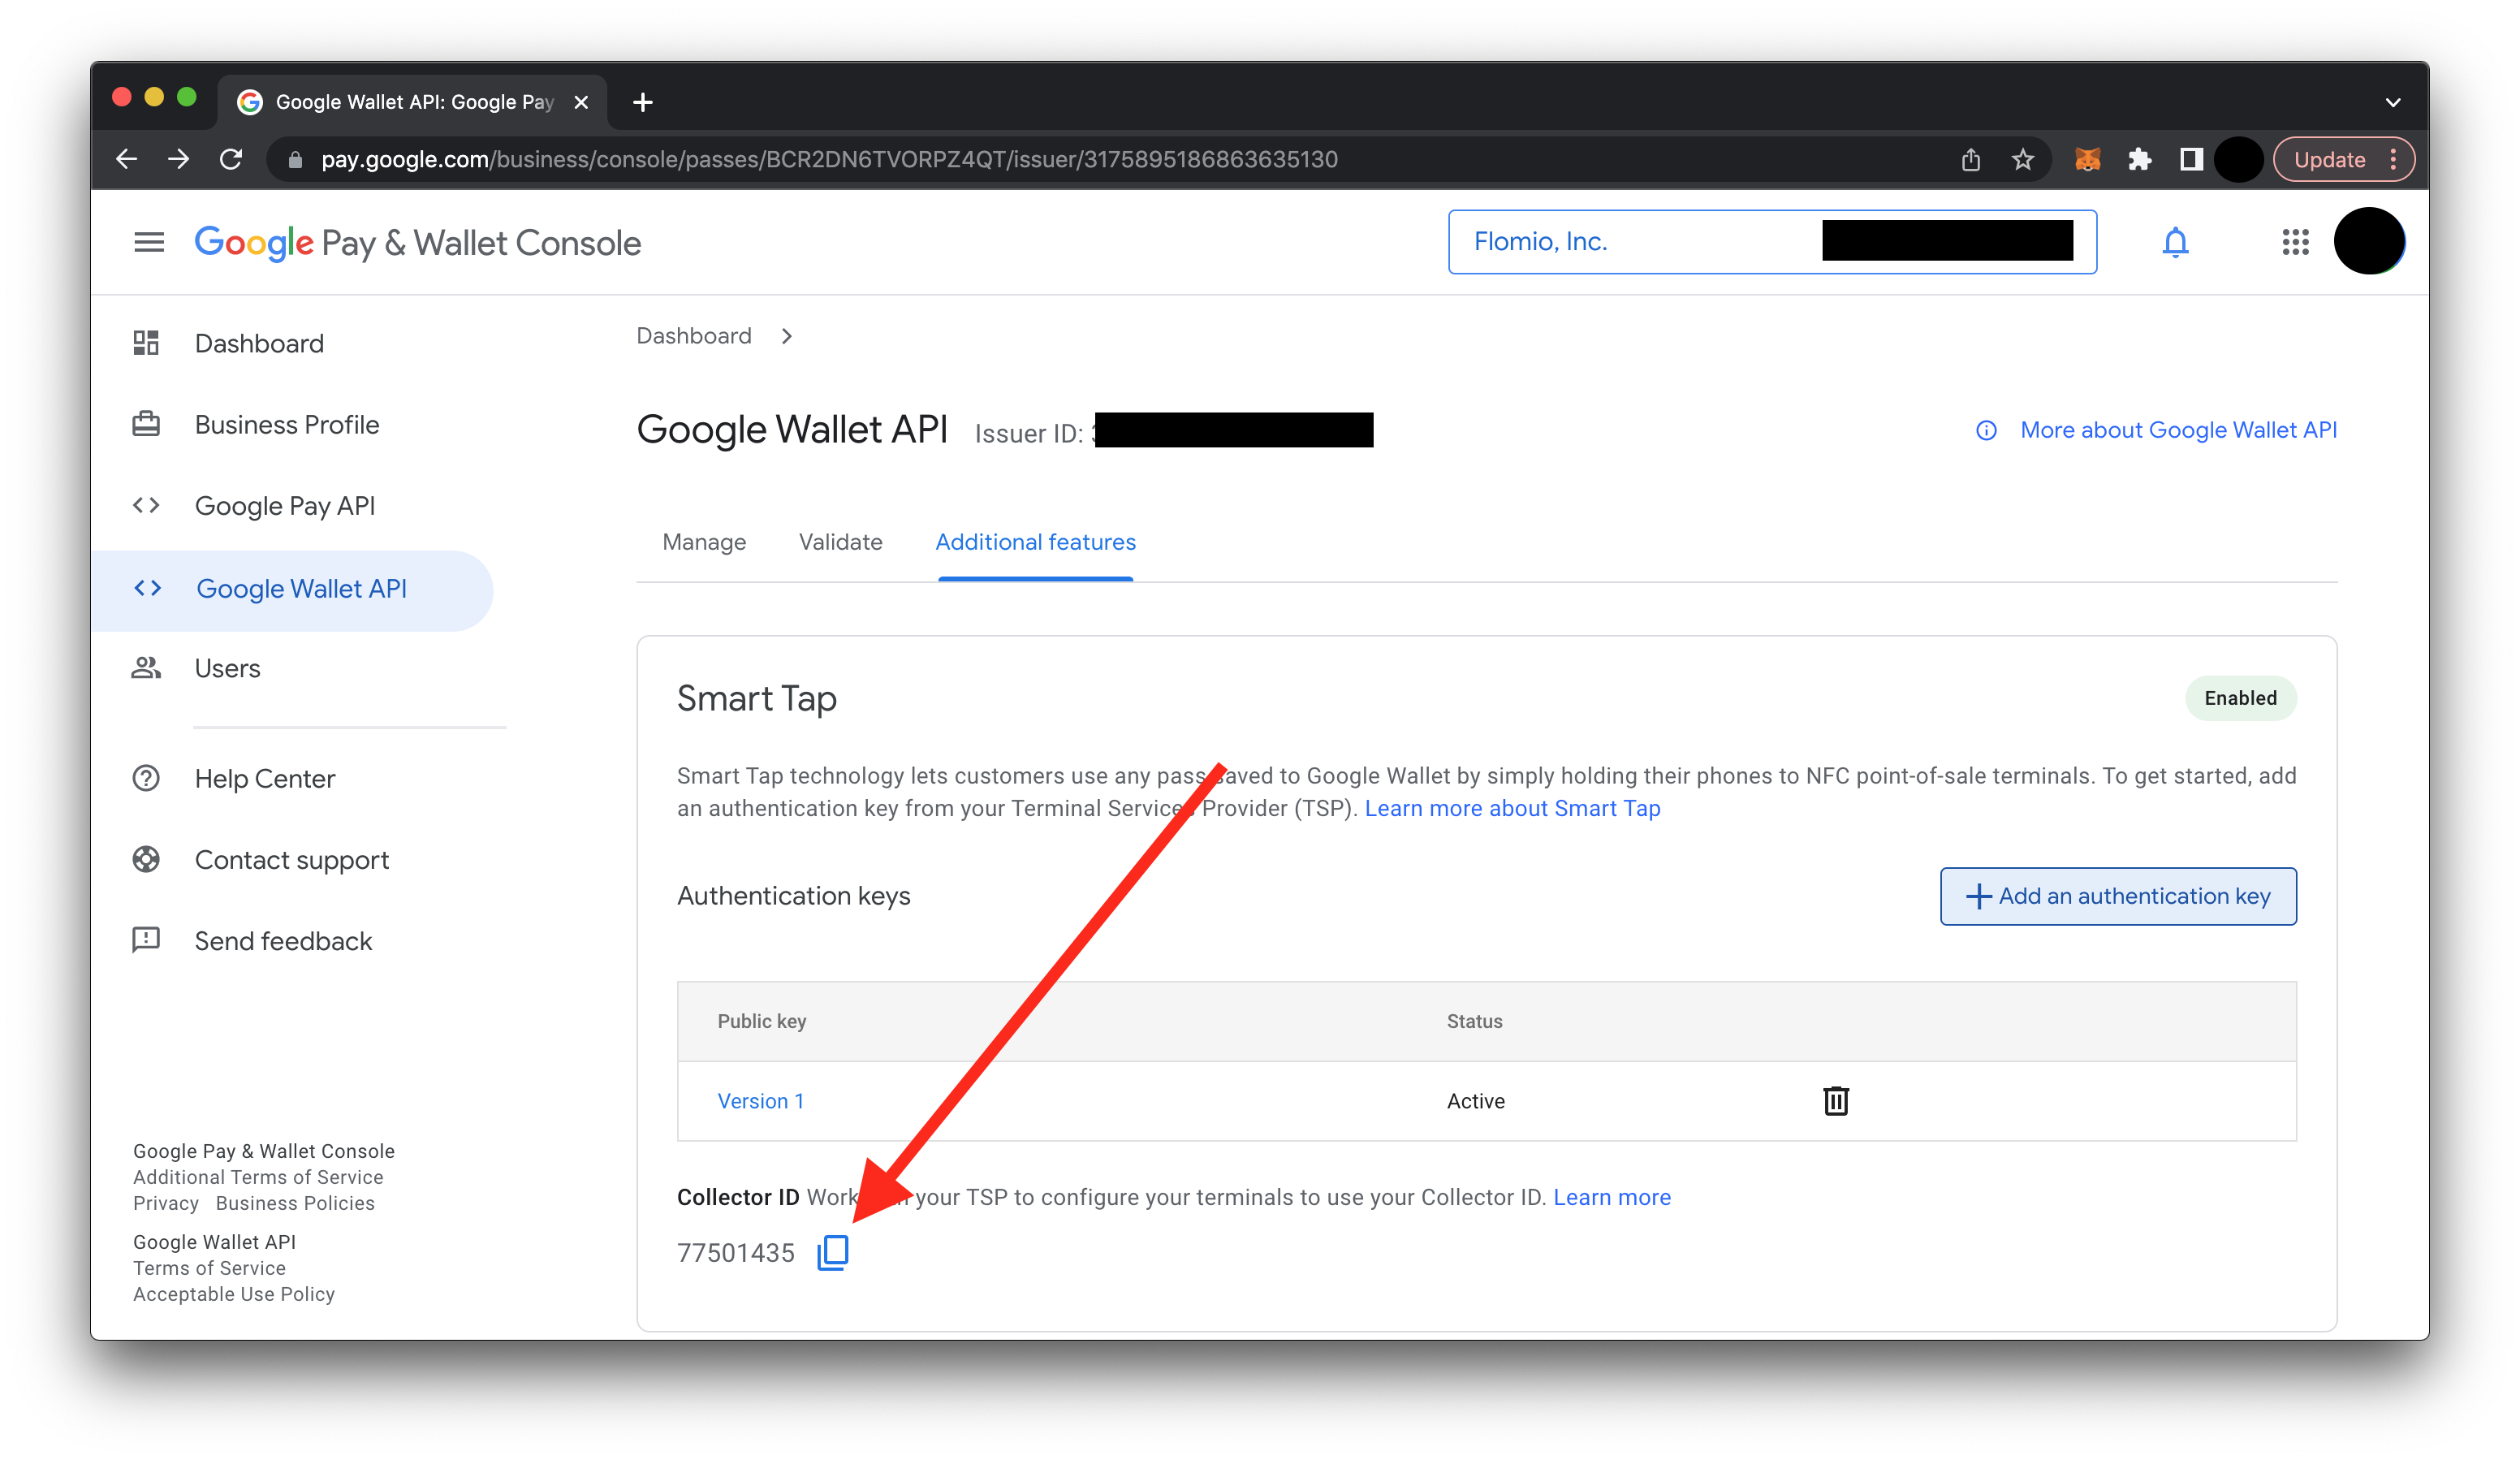
Grab your Collector ID
Finally, copy your Collector ID. Save it some place, you'll need it when you are configuring your NFC / VAS reader.
You can now load your Collector ID, private key and key version into your terminal reader. If you're not sure how to do this, please check out our tutorial on how to configure a VAS reader.
Putting your issuer ID in your Google pass JWT payload
If you're developing your own Google Wallet passes, you'll need your issuer ID. It's pretty easy to find once you have created your Collector ID. It's right near the top of the page:
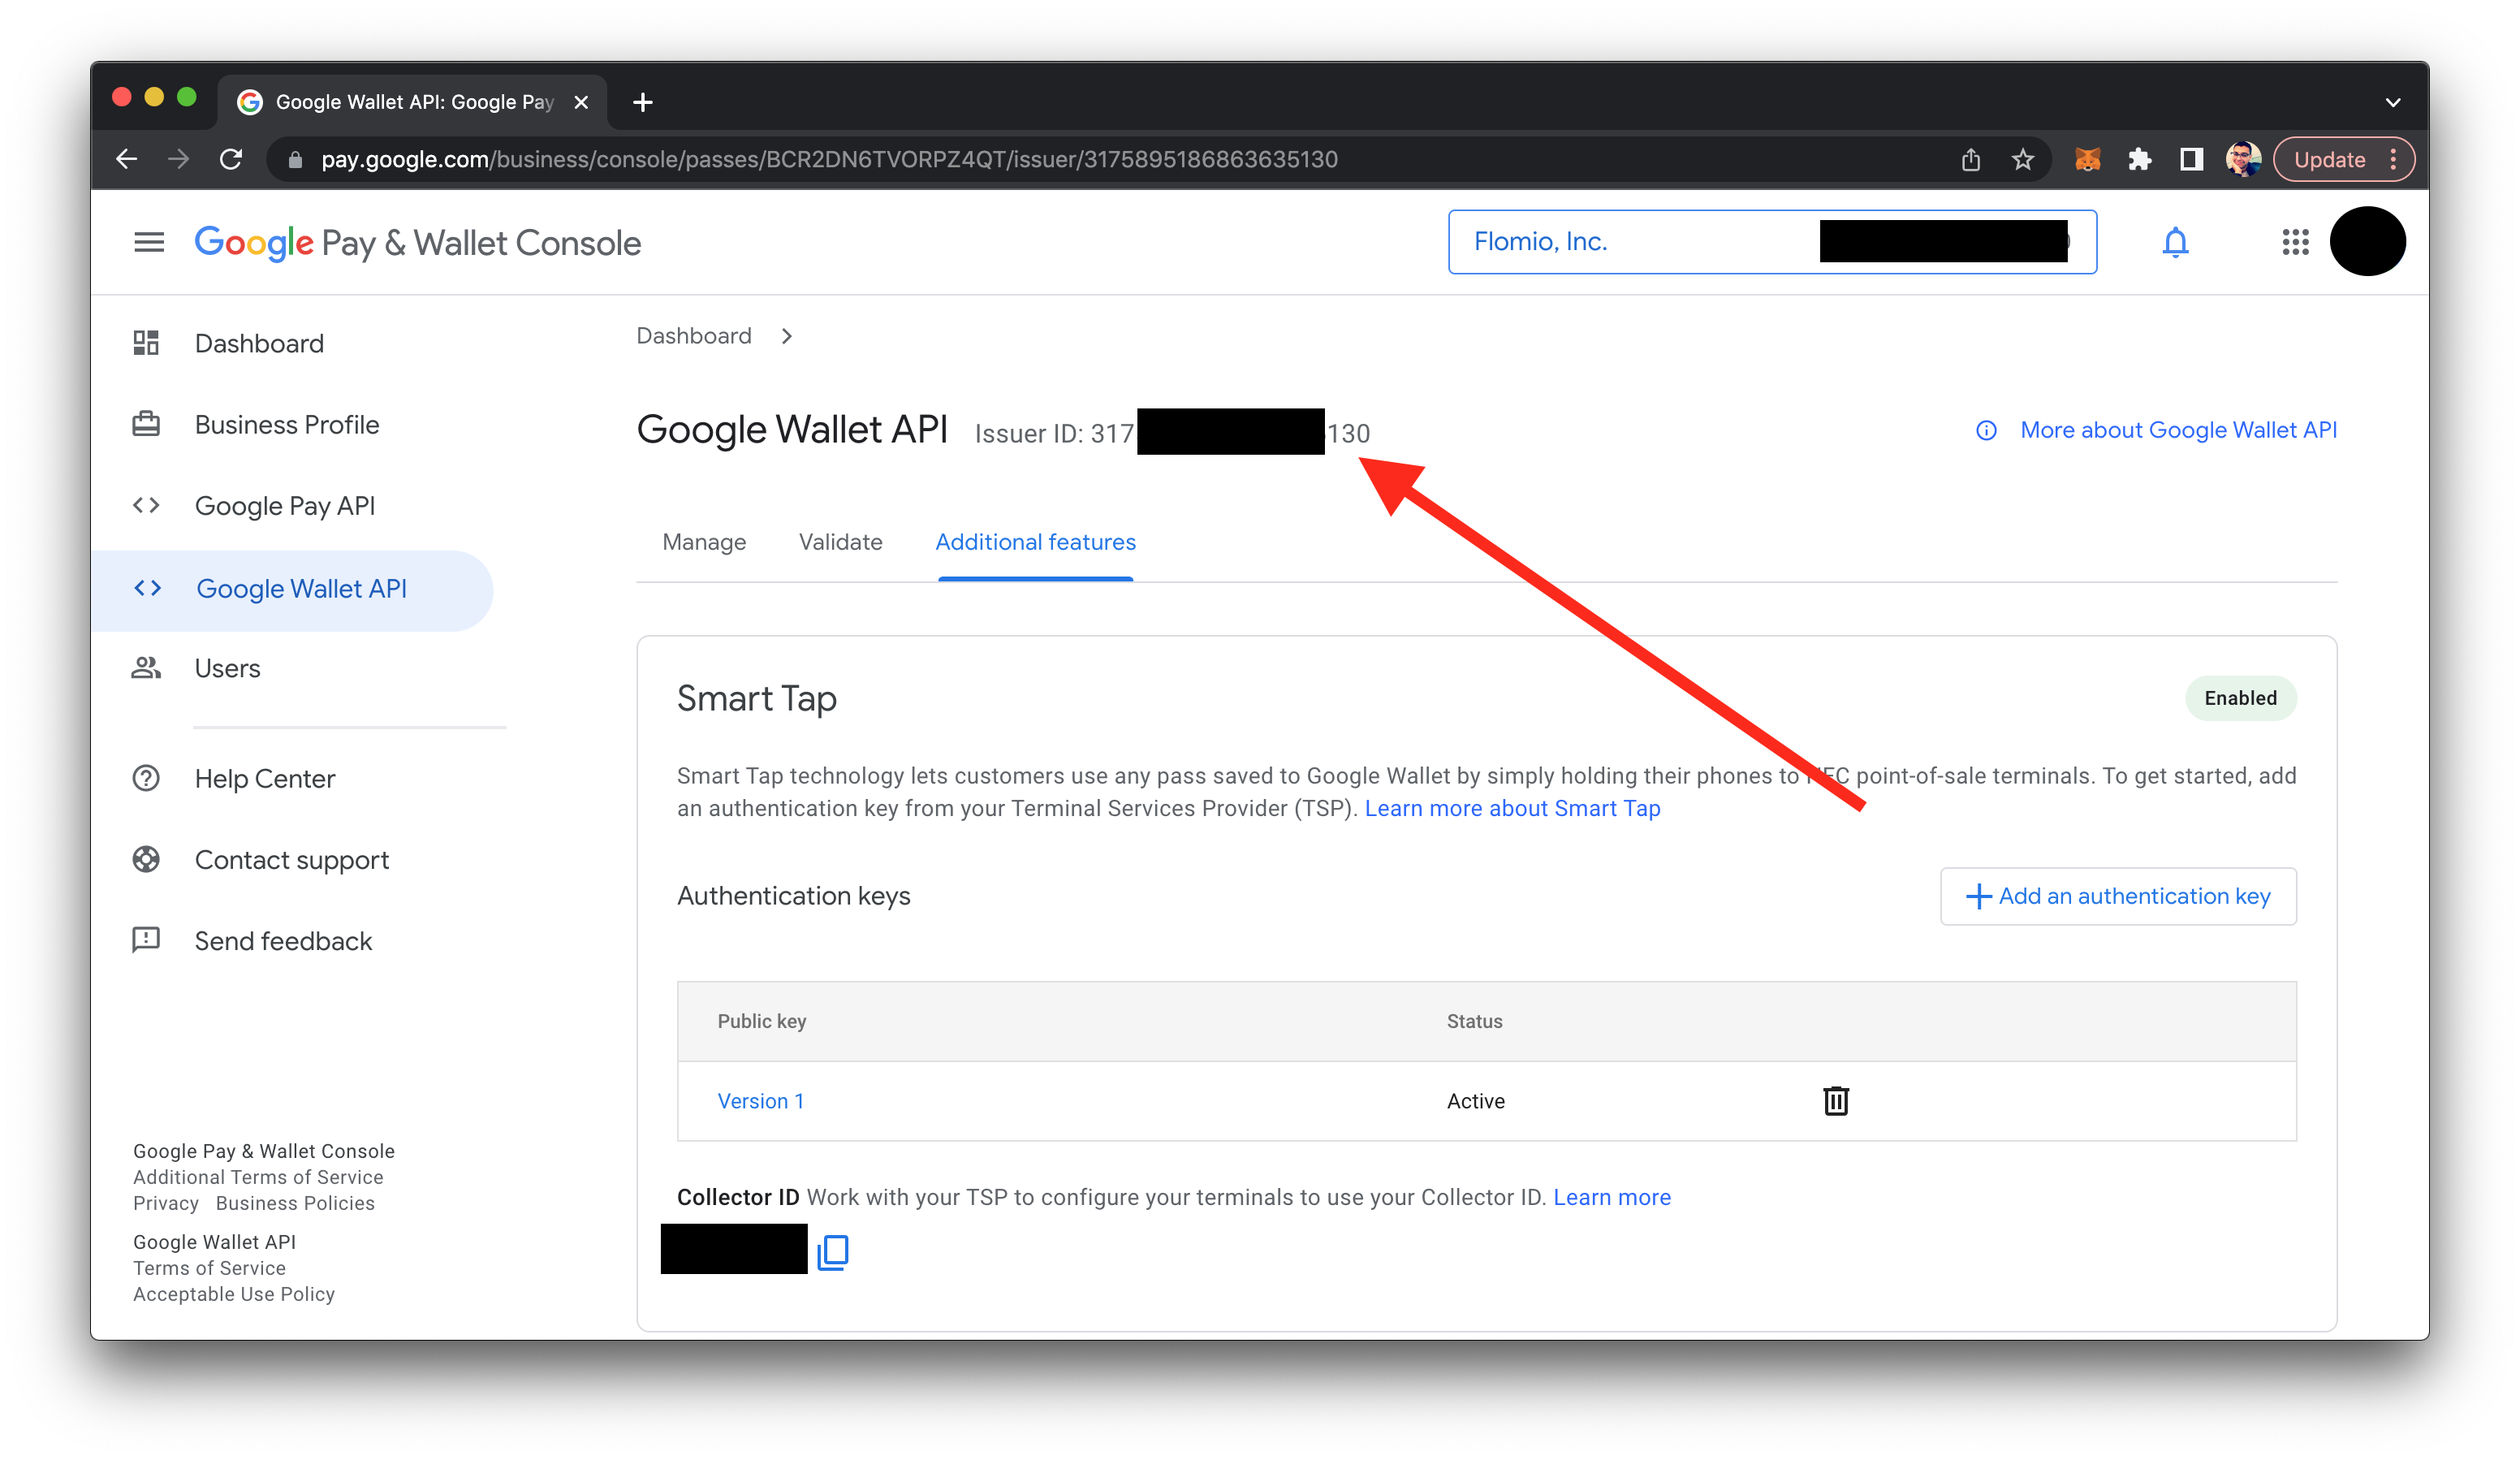
Once you have your issuer ID, be sure to stick this ID in the array for the JSON key (redemptionIssuers) in the JWT payload:
{
  "redemptionIssuers": [123456],
  "enableSmartTap": true,
  "smartTapRedemptionValue": "[whatever-64-char-message-you-want]"
}
Simplest way to avoid key management
Creating identifiers and managing their key pairs can be a pain when you're trying to turn around new pass campaigns quickly. PassNinja automates this for you so you can streamline your workflow while staying protected against malicious attacks. Let us know if you have questions about how our porducts can get you up and running in record time.
Conclusion
This guide walked you through the steps to create and locate Collector IDs in the Google Developer portal. It's an important step in adding NFC capabilities to your property or project. You can use these IDs to create passes as well as read passes.