How to configure a SocketMobile S550 Bluetooth NFC reader

Updated December 26, 2025 00:10
Overview
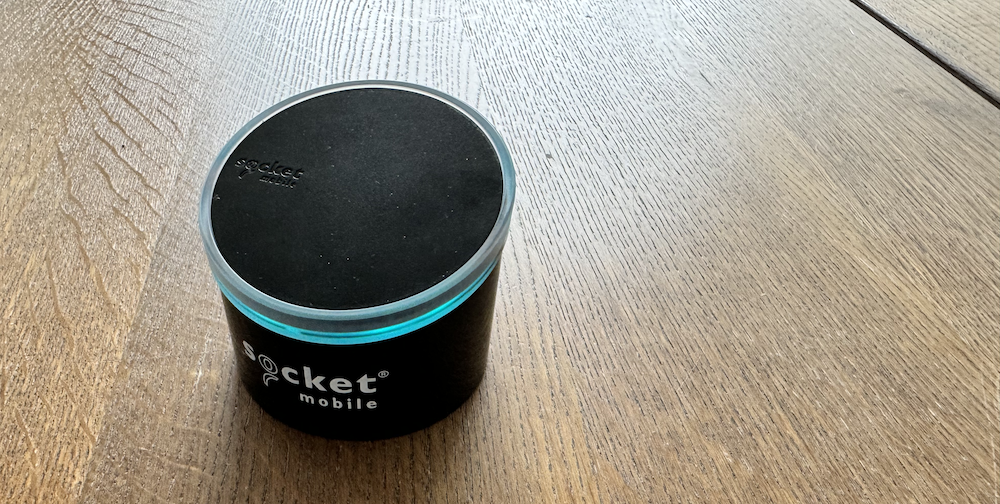
This guide will cover the process of setting up a VAS compatible bluetooth enabled NFC reader to detect and verify Apple passes over NFC. VAS readers are made by only a few manufacturers and mostly sold through third party integrators. This can make it challenging for developers to get familiar with mobile wallet NFC technologies. We focus on the S550 from SocketMobile, which we sell, pre-configured with your accounts keys. It's powered by a battery and supports keyboard emulation so it's easy to build systems using it. We'll create a demo app using keyboard emulation as well.

The S550 reader interacts with Apple and Google Wallets over the NFC interface by following the VAS protocol. The S550 has two modes, "Reader" and "Keyboard emulation". Once configured with the correct credentials, put into keyboard emulation mode and connected to over bluetooth, simply tap your smartphone against the scan surface. Your mobile NFC pass will be auto-selected and it's data sent to the connected device. In our case, it's going to be a Macbook Pro.
Of course, the data can only be read if your phone contains a mobile NFC pass that has been issued in connection with the Apple Pass Type ID(s) or Google Collector ID(s) configured in the S550 reader via the SocketMobile NFC Script app, which sends APDUs.
This tutorial assumes you've met the following pre-requisites:
- Have a SocketMobile S550
- Have a SocketMobile developer account
- Have the SocketMobile developer configuration cards - if you do not, please email developers[at]socketmobile.com to request
- An iPhone with an Apple pass installed
- A computer with Bluetooth capability
Get Apple Pass Credentials
You will need the reading credentials for your Apple Wallet passes in order to configure the VAS reader to scan them. We covered generating these credentials in this Apple guide and includes two pieces of data: the Pass Type ID used to sign pass bundles and the private.pem key that encrypts the data sent over NFC. Pass type IDs will be needed for configuration and look like this:
pass.com.myorg.myapp.mycampaignIf you're a PassNinja customer these are available in the PassNinja dash. We'll need to transform this key, so that it can be transferred to the S550. We'll do that using the example above:
echo -n "pass.com.myorg.myapp.mycampaign" | openssl dgst -sha256 | tr '[:lower:]' '[:upper:]'This should output something like this:
9CDC0DFB12BB9F2E7020C03433D626BB10A965A364416180BD8A20BDA327B65ENext, we need the NFC private key. The private key must be in EC Key PEM format, we'll need that to extract the raw bytes of the private key to load onto the reader. Generating the keys for NFC passes to work can be tricky, so follow this guide to create encryption keys for Apple Wallet. The gist is that the public key goes into the Apple passes and the private key goes into the VAS reader (S550). Once you have the private key in a file titled example.pem, run the following command:
openssl ec -in example.pem -text -nooutYou should see something like this:
read EC key
Private-Key: (256 bit)
priv:
    6d:75:77:f4:f0:84:97:93:5a:e6:1e:33:b7:77:e3:
    ac:51:a2:79:c4:2e:5d:a9:24:39:a2:9d:0f:41:3f:
    03:c2
pub:
    04:d7:0e:28:f5:aa:a8:fa:6c:3b:d7:f1:d4:b3:19:
    b6:a5:0c:ae:10:51:b8:a9:74:5c:15:f8:f9:b7:d6:
    77:29:6f:21:c3:d5:85:78:1f:e6:b6:31:8d:fa:f2:
    28:b5:dd:92:39:00:0e:a2:04:d7:84:cb:ea:04:f3:
    8a:f8:f4:b8:ce
ASN1 OID: prime256v1
NIST CURVE: P-256
writing EC key
-----BEGIN PUBLIC KEY-----
MFkwEwYHKoZIzj0CAQYIKoZIzj0DAQcDQgAE1w4o9aqo+mw71/HUsxm2pQyuEFG4
qXRcFfj5t9Z3KW8hw9WFeB/mtjGN+vIotd2SOQAOogTXhMvqBPOK+PS4zg==
-----END PUBLIC KEY-----
The priv section has the raw bytes we need to concatenate. Let's just remove the colons and make the string uppercase:
openssl ec -in example.pem -text -noout | awk '/priv:/{flag=1; next}/pub:/{flag=0}flag' | tr -d '\n: ' | tr '[:lower:]' '[:upper:]'Should output:
6D7577F4F08497935AE61E33B777E3AC51A279C42E5DA92439A29D0F413F03C2We need it all uppercase for later. So save this and the output of the pass type ID, we'll need them soon.
Install credentials on the S550 Reader
Here are the steps to get your reader configured:
Step 1: Put the S550 into Coupler mode
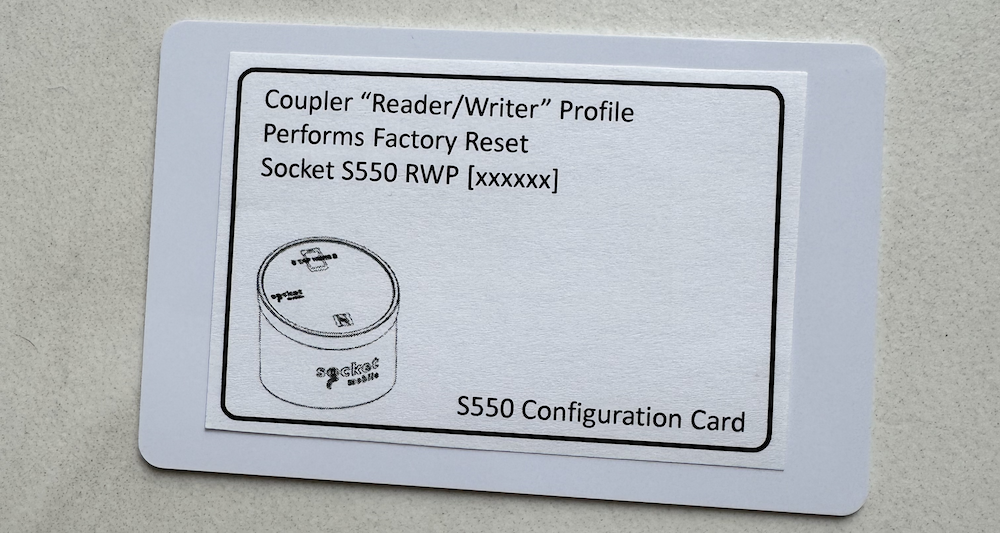
You'll need to download the NFC Script app as mentioned before. If you've purchased the S550 from SocketMobile, and you have the configuration cards, grab the one that looks like this:

Power up your S550 and hold the card against the reader, it will take 2-5 seconds and say "Please wait", keep holding the card there until it says "Factory reset". You can now place the card aside.
Step 2: Open the NFC Script app and find the reader
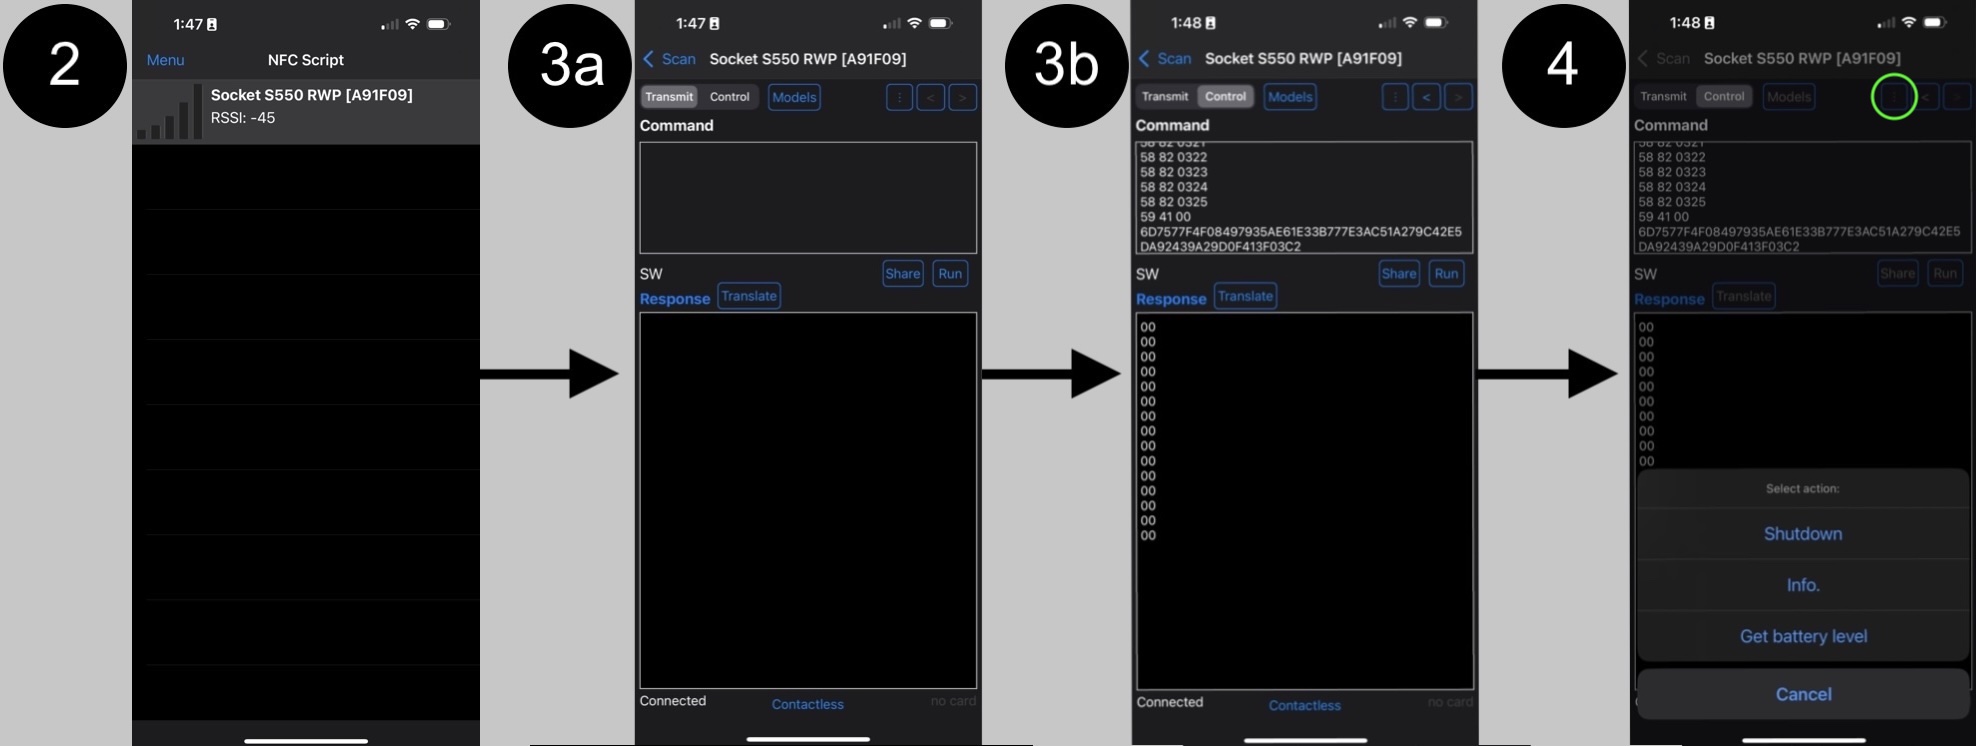
Next you'll need to open the NFC Script app and find the reader, it should look something like #2 below:

NOTE: You may experience the S550 connect and then immediately disconnect. This is a known issue and relates to a stale pairing code in memory. You need to use the Unpair card to erase it. If you hold the Unpair card on the S550 after power up, you should hear the device respond with "Disconnected" and reboot. Now you should be able to pair and connect with the reader properly.
Step 3: Send the credentials over Bluetooth as APDUs
Now you'll need to tap it, to get to the config screen, which looks like #3a above. We're going to configure the S550 device so that it uses your credentials but also, to perform actions in keyboard emulation mode. In the top box, you need to paste the APDUs to make the reader use your pass type ID and your NFC private key. Here is a sample, that you can update with the values we created above:
58 82 0237 02
58 82 023A 01
58 82 02C0 03
58 82 0310 D1
58 82 0311
58 82 0312
58 82 0316 [YOUR PASSTYPE ID HASH]
58 82 0318 00
58 82 0320
58 82 0321
58 82 0322
58 82 0323
58 82 0324
58 82 0325
59 41 [YOUR PRIVATE KEY BYTES]
Tap run, you should see 00's come back as success (see #3b above).
Step 4: Restart the device
Now you should restart the device, you can do this by tapping the power button on the back of the S550 device or using the NFC Script App to send a shutdown APDU (under the ":" menu marked in green, see #4 above).
Reading passes.
Now you need to connect to the reader over bluetooth on your computer. It should show up in the bluetooth device list as a keyboard titled "Socket S550 Kep [A9...]". Select and connect!
Now that you're paired, your S550 is configured to read passes and send pass data over bluetooth in plaintext, we'll create a little python script to read passes:
IMPORTANT SECURITY CONSIDERATION: This is a toy app, it has no security whatsoever, so any valid keyboard input will make it run.
pass_data = input("Please scan pass...")
print(f"Pass data found: {pass_data}!")
Put this in a file named nfc.py. Go ahead and run the script with python nfc.py it should tell you to scan the pass.
Now put your phone with a pass up to the reader. It should work and your script should show you the encrypted data from the pass! Congrats! 🎉
Making it simple with PassNinja
If you're using PassNinja and you buy a devkit, they come preconfigured with the keys for your pass templates! Skip the pain of generating private/public key pairs, creating pass type identifiers, collector ids, issuer ids, hashing strings, doing other string manipulation and sending APDUs over bluetooth for configuration.
Creating identifiers and their associated encryption keys can be a pain when you're trying to turn around new pass campaigns quickly. PassNinja automates this for you so you can streamline your workflow while staying protected against malicious attacks. Sign up now so you can get up and running ASAP.
Conclusion
This guide taught you about the S550 from Socket Mobile, and covered how to connect and configure it with your Apple pass credentials and more. It's one of the most important steps in getting your NFC passes read by hardware devices. You could theoretically use this to build out a Raspberry Pi app that controls other IoT devices!
Next steps after this include narrowing your use case so you can identify the right production setup to get your NFC experience live in the wild.
More articles focused on Hardware
The VTAP series of NFC readers from DotOrigin are popular because of their ease of use and broad ...
How To Build An Nfc Car KeyThis guide will show you how to replace your car keys with an NFC-enabled pass in your Apple or G...
How To Configure A Dot Origin Vtap100 Nfc ReaderThis guide will cover the process of setting up a VAS reader to detect and verify Apple and Googl...
How To Configure A Reyax Ryrr30d Nfc ReaderThis guide provides detailed instructions on setting up the Reyax RYRR30D USB-C NFC reader to int...
How To Configure A Famoco Tap&Go Nfc ReaderThis guide shows exactly how to take Famoco’s VAS sample, make it build cleanly on current Androi...
How To Control Vtap From Background (Macosx)The VTAP series of NFC readers from DotOrigin are popular because of their ease of use and broad ...
How To Control Any Device With A Relay And Raspberry PiThis guide covers how to control electrical equipment like an appliance or battery-powered device...